

The Responses tab allows you to customize the default messaging response, which greets your customers when they initiate an interaction in the Web Widget or mobile channel.
You can also upgrade your channel to a conversational bot. When you do so, the messaging responses configured here are disabled, and replaced by the initial greetings included in your bot. SeeUsing a messaging bot for your web and mobile channels.
从这个标签也可以应用一个支持schedule to create separate responses for your working hours, and customize automated responses. See
This article includes the following topics:
Working with the default messaging response
The default messaging response Once a messaging widget is enabled, the default messaging response is activated, which provides a functional, basic conversation to greet a customer when they launch the Web Widget, and transfers them to an agent.
The default messaging response includes a basic greeting for customers and a request for information about their support needs, then a message letting them know they’re being connected to an agent. Behind the scenes, agents are notified in the Agent Workspace that a support request has been received, and they can accept the request and begin responding to the conversation.
Without any configuration actions on your part, the default messaging response appears to the end user as follows:
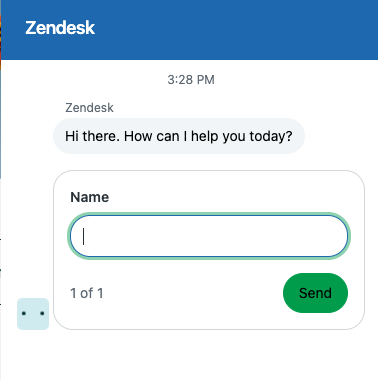
There are a number of options available to customize this interaction, including requesting customer information and establishing business hours.
Whether you are using the business hours option or not, you can customize the response your customers receive when they launch the Web Widget.
To customize your automated response
- InAdmin Center, click
 Channelsin the sidebar, then selectMessaging and social > Messaging.
 - Click the name of the channel you want to edit. The Edit Web Widget page opens.
- Click theResponsestab.
- Expand theResponse during business hourssection. The default messaging response information is displayed in the text boxes.
- Update the following:
- First message: Enter the text that appears when a customer launches the Web Widget.
- Customer details: Use the drop-down to select the information (Name and/or Email) you want to request from the customer before handing them off to an agent. Customers must enter information into these fields before behind handed off to an agent. End user email addresses cannot contain accented characters.Note:These settings may be impacted by yourend user authentication configuration.
- Follow-up message: Enter the text that appears after the customer submits their details, if enabled.
- If using business hours, expand theResponse outside of business hourssection and update the information as described in the previous step.
- ClickSave settings.
Enabling a messaging bot
At the bottom of the tab, you have the option to add a bot to your messaging configuration, which allows you to offer highly customized automated conversation experiences to your customers.

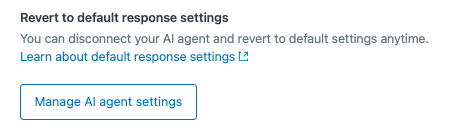
If you have already enabled a messaging bot, you have the option of disabling it and returning to the default messaging response.
4 Comments
Why are you not able to add other fields that are not name or email? Also, why is required to collect name and/or email in the messaging widget?
You are able to add other fields that are not name or email - please useAdding custom fields to your tickets and support request form. You can skip fields where is required to collect names and/or emails in the messaging widget instead you can use different step types. Please follow -Understanding answer flow step types.
Hope it helps
"Working with the default messaging response"
- can a description field be added for "Response outside of business hours"? It seems essential to me.
Viktor Osetrov但你能确实添加自定义字段作为of the user prompt without configuring your own BOT?
Pleasesign into leave a comment.