Developing private ZIS integrations
Zendesk Integration Services (ZIS) lets you build and run private integrations in your Zendesk instance. This article describes the main steps for developing and managing a private integration.
ZIS is available on the Suite Growth plan or above, and the Support Professional plan or above.
Zendesk recommends building and testing a private integration in asponsored test accountbefore running it in a customer account.
This article covers the following development workflow:

Registering the integration name
The first step in building an integration is registering the name of the integration with the ZIS Registry Service. This name is also called the integration key.
To register the integration, make a POST request to theCreate Integrationendpoint specifying a unique name for the integration.
Example:
旋度https://example.zendesk.com/api/services/zis/registry/slack_integration_development_acme1234\-d'{"description": "An example integration"}'\-H"Content-type: application/json"\-v -u[email protected]:northw00ds -X POST
The request registers an integration namedslack_integration_development_acme1234.
The integration name can be a string up to 64 characters long consisting of lower-case letters (a-z), numbers, the dash (-) character, or the underscore (_) character.
Since the name of an integration must be globally unique, use one name when building an integration in your test account and a different name when running it in production in your customer's account. For example, you can use “slack_integration_development_acme1234” in your developer account and “slack_integration_acme1234” in your customer account.
You can authorize the API request using basic authentication or a Zendesk API token. SeeSecurity and authenticationin the Zendesk API documentation.
You must be a Zendesk admin to make the API request. If you're not an admin, ask an admin in your organization to assign the admin role to you.
When you register a ZIS integration, the request automatically creates an OAuth client for Zendesk. The response contains the OAuth client's details. Example:
{"description":"An example integration","jwt_public_key":"***The RSA Public Key to be saved***","zendesk_oauth_client":{"id":10066,"identifier":"zis_{integration_name}","secret":"***secret***"}}
Save the response in a safe place. Later, you can use the clientidto obtain a ZIS OAuth token.
Obtaining a ZIS OAuth token
Most ZIS integrations have a private Zendesk app that the developer creates. The app typically uses ZIS APIs to let Zendesk admins:
- Connect the integration to their Zendesk instance and third-party services
- Configure settings for the integration
- Enable the integration byinstalling the job spec
- Disable the integration byuninstalling the job spec
In most cases, the app uses the admin's browser session to authenticate these ZIS API requests. SeeMaking API requests from a Zendesk app.
A ZIS OAuth token lets developers make ZIS API requests without creating a Zendesk app. This is useful when building or testing an integration. Developers can also use the token with ZIS API endpoints that don't support browser session authentication.
Important:Keep the following in mind when creating and using a ZIS OAuth token:
The token isn't intended for use in a ZIS flow. To authenticate Zendesk API requests in a ZIS flow, use a connection instead. SeeUnderstanding connections.
The token is scoped to a specific ZIS integration and Zendesk subdomain. You can't use the token to authenticate ZIS API requests for other integrations or subdomains.
To get a ZIS OAuth token
If you have the client
idfor your integration's Zendesk OAuth client, skip to step 3. Otherwise, make a curl request to theList OAuth Clientsendpoint.旋度https://example.zendesk.com/api/v2/oauth/clients.json \-u[email protected]:northw00ds请求返回你的帐户的列表的Zendesk OAuth clients.
In the response, find the client with an
identifierthat matches your integration's name with azis_prefix.Copy the client’s
id. This is the same client id returned when youregistered the integration name.{"clients":[{"url":"https://example.zendesk.com/api/v2/oauth/clients/10066.json","id":10066,"user_id":-1,"name":"ZIS Client","identifier":"zis_slack_integration_development_acme1234","company":null,"description":null,"redirect_uri":["https://zis.zendesk.com/api/services/zis/connections/oauth/callback"],"secret":"***secret***","created_at":"2099-05-06T01:22:08Z","updated_at":"2099-05-06T01:22:08Z","global":false,"logo_url":null},...],"next_page":null,"previous_page":null,"count":1}Make a curl request to theCreate Tokenendpoint. Specify the client id for the integration's Zendesk OAuth client.
旋度-X POST https://example.zendesk.com/api/v2/oauth/tokens.json \-u[email protected]:northw00ds \-H "Content-Type: application/json" \-d '{"token": {"client_id": "10066","scopes": ["read", "write"]}}'The response's
令牌.full_tokenproperty contains the ZIS OAuth token. Save the token in a safe place.{"token":{"url":"https://example.zendesk.com/api/v2/oauth/tokens/1234.json","scopes":["read","write"],..."full_token":"***access token***"}}
Creating a ZIS bundle
A ZISBundleis a JSON object that defines the logic of your integration. It contains three types of nested objects:
Actionobjects specify the work to be doneFlowobjects specify the actions to run in what orderJobSpecobjects specify the flows to run when given events happen
To create a simple bundle for testing, seeBuilding your first ZIS integration. To make authenticated API requests in the integration's ZIS flow, use a connection. SeeUnderstanding connections.
Uploading the ZIS bundle
To deploy your integration, upload the bundle to the ZIS Registry Service using the上传或更新包endpoint.
Example request:
旋度https://example.zendesk.com/api/services/zis/registry/slack_integration_development_acme1234/bundles\-d @my_bundle_file.json\-H"Content-type: application/json"\-v -u[email protected]:northw00ds -X POST
If the bundle was uploaded successfully, the request returns an empty 200 response.
Installing the job spec
A ZISJobSpecis an object in the ZIS bundle that specifies the flow to run when a given event happens. Example:
"react_to_ticket_created_job_spec":{"type":"ZIS::JobSpec","properties":{"name":"react_to_ticket_created_job_spec",“event_source”:"support","event_type":"ticket.TicketCreated","flow_name":"zis:my_integration:flow:my_new_ticket_flow"}}
After uploading your ZIS bundle, you need to tell ZIS to install each job spec contained in the uploaded bundle.
To install a job spec, make an API request to theInstall Job Specendpoint.
Example request:
旋度"https://example.zendesk.com/api/services/zis/registry/job_specs/install?job_spec_name=zis:slack_integration_development_acme1234:job_spec:handle-ticket-created-event"\-H"Authorization: Bearer 29cb46de50dd1d7d600fc1057e7b72"\-X POST
Make sure to enclose the endpoint in quotes because of the special characters.
If the job spec was uploaded successfully, the request returns an empty 200 response.
Note:Removing a job spec from a ZIS bundle doesn't uninstall the job spec. A removed job spec can still kick off its ZIS flow. To uninstall a job spec, seeDisabling the integration.
Testing and updating the integration
You can test your the ZIS integration after deploying it. The workflow is to test, update the ZIS bundle locally, upload the bundle, then test the update.
SeeUploading the ZIS bundlefor more information.
You can use the integrations log in the Zendesk Admin Center to help troubleshoot issues:
Sign into your Zendesk account as a admin.
In Admin Center, click Apps and integrations in the sidebar, then select Integrations > Logs.
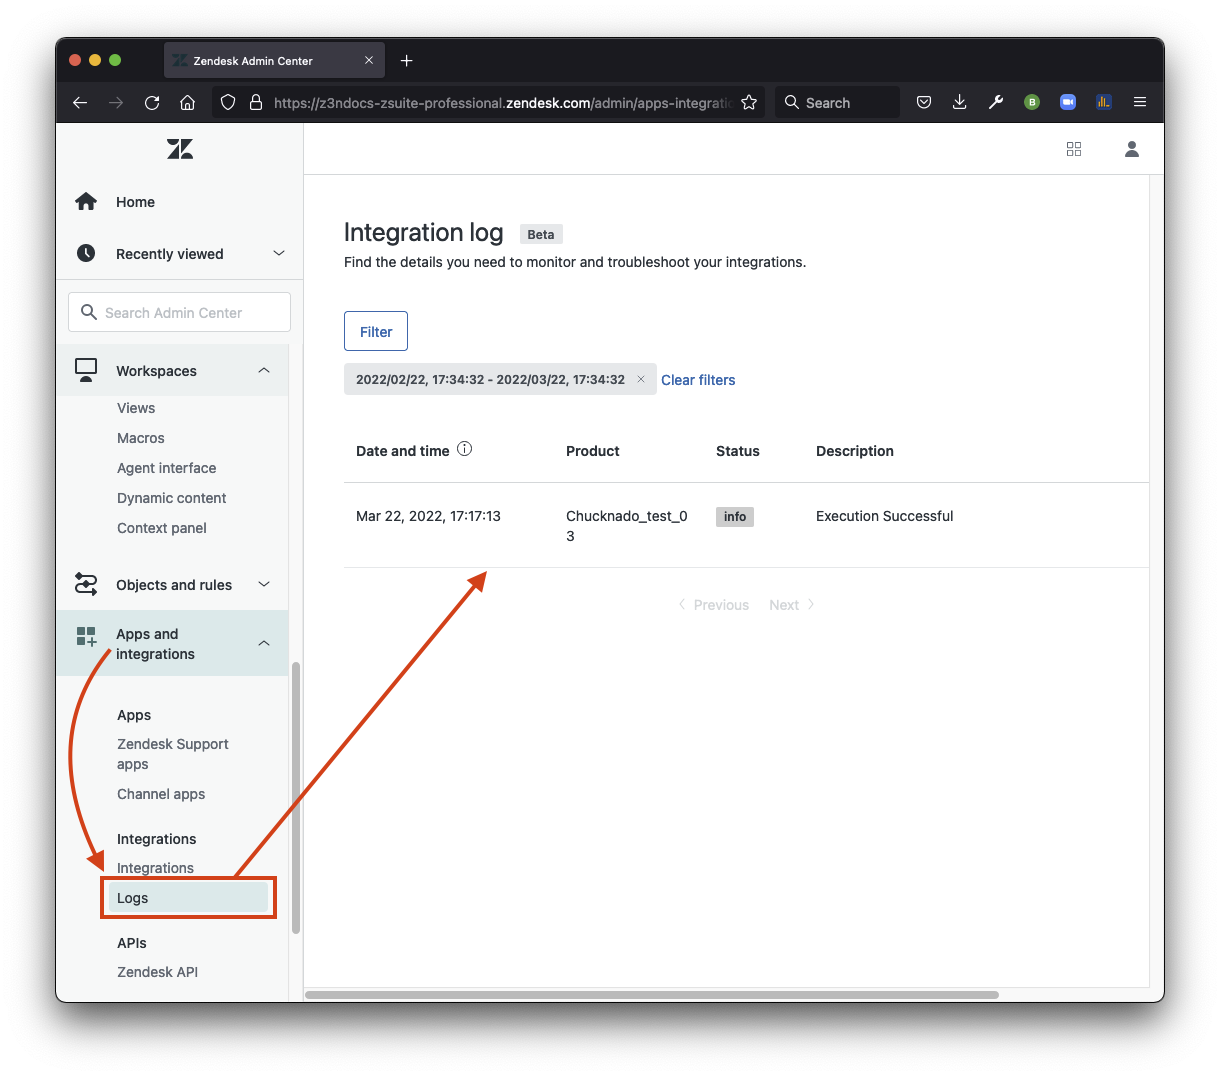
For more information, seeViewing the integrations login the Zendesk help center.
Disabling the integration
We recommend you disable ZIS integrations before a data migration or other large-scale change. Such changes can create a large number of events and kick off multiple ZIS flows in a short period, exceedingusage limits. Depending on the integration, it may also create an undesired user experience.
You can disable a private integration by uninstalling the job spec in a customer’s account using theUninstall Job Specendpoint.
Example request:
旋度"https://example.zendesk.com/api/services/zis/registry/job_specs/install?job_spec_name=zis:slack_integration_development_acme1234:job_spec:handle-ticket-created-event"\-H"Authorization: Bearer 29cb46de50dd1d7d600fc1057e7b72"\-X DELETE
If the job spec was uninstalled successfully, the request returns an empty 204 response.
Note:You can't delete a ZIS integration or bundle. To disable an integration, you must uninstall its job spec.