


You can access your tickets in the Zendesk Support mobile app (seeInstalling the mobile app). Which tickets you see, and how you interact with them, is determined by the permissions applied to your account. SeeUnderstanding Guide roles and setting permissions.
This article describes the following functionality:
- About the Ticket List screen
- Working with conversational messages
- Viewing tickets
- Viewing and updating ticket properties
- Adding comments to tickets
- Applying macros to tickets
- Creating tickets
- Using attachments in ticket comments
- Playing attached audio calls and voicemails
- Viewing service level agreements
- Sharing tickets
- Deleting tickets
- Marking tickets as spam
Related articles:
About the Ticket List screen
The Tickets screen is open by default on both iOS and Android devices, with the most recent view used displayed:
| iOS | Android |
|---|---|
 |
 |
To access the Tickets screen from another screen
- iOS users: In the bottom toolbar, tap theTickets icon(
 ).
).Android users: Tap theback arrow(
 ) until the Ticket screen appears.
On the screens in the examples above, you can see:
- The name of the displayed view. iOS users also see the number of tickets in the view:
iOS Android 

- The sorting applied to the view:
iOS Android 

- Basic information about each ticket, including the avatar for the ticket requester, the ticket subject, and the submission date:

Working with conversational messages
When youactivate the new agent experience,移动应用与代理Workspac兼容e and supports conversational messaging.
Ticket information is split into two tabs:
- Conversations: Includes the latest messages/emails from the conversation in the ticket and allows you to reply to a ticket (including through the messaging channel).
- Details: Lets you view and update ticket information, such as tags, assignee, and requester information.
The Conversations tab
Viewing ticket metadata
You can view metadata in a ticket, including when it was sent, via what channel, and by whom.
- On a ticket'sConversationstab, tap the message in the ticket whose metadata you want to view.
The message's metadata displays.
Replying to a requester or ticket
- Messagingsends a messaging reply to the user.
- Emailsends an email to the user.
- Internal notesends an internal message on the ticket that's only visible by other agents.
Additionally, you can tap the menu (![]() ) icon in the upper-right corner to:
) icon in the upper-right corner to:
- Mark the ticket as spam
- 删除the ticket
- Share the ticket
- Follow the ticket
- On a ticket'sConversationstab, use the channel switcher to select the channel you want to send the message through.
- Tap the composer text box and enter your message.

- To attach files or images, tap the paper clip (
 ) icon to open your device's file manager and select an image or an attachemnt.
You can also take a picture with your device's camera by tapping the camera (
 )icon.
 - If you're replying by email and want to add cc's to the ticket, add them by tapping on the Cc (
 )icon.
 - If you're replying with an internal note, tap the @ (
 ) icon to mention colleagues.
To learn more about CCs and mentions, seeUsing CCs and followersandUsing @mentions.
- To apply a macro, tap the macro icon beside the composer and select the macro you want to apply.
- When you're done entering your reply, tap the submit (
 ) icon.
Updating the ticket status
On the Conversations tab, you can change a ticket's status.
- On a ticket'sConversationstab, tap the status button.
- Select your desired status for the ticket.
- Tap the submit () icon.
Viewing and editing requester profile information
You can view and edit a requester's profile information on a ticket's Conversations tab.
To view or edit a requester's profile information
- On a ticket's Conversations tab, tap on the requester's avatar in the upper-left corner of the screen or on their avatar inside the conversation.
The requester's profile information displays. You can edit the information as needed.
iOS Android 

You can also tap on another agent's profile in the conversation to display their profile and associated tickets but you can't edit this information.
The Details tab
The Details tab displays additional ticket information, such as tags, assignee, and requester information. You can edit this information on this tab.
To access the Details tab and edit ticket properties
- From a ticket's Conversations tab, swipe left or tap theDetailstab.
iOS Android 

- Tap the property you want to change.
A dialog appears and guides you through the process of changing or updating the property.
- Tap the submit icon in the bottom-right of the screen.
You can also submit multiple changes at once. If you've drafted a reply to the customer and also want to change the status, assignee of the ticket, and add a tag to it, you can do so by making all the changes and then tapping the submit (
) icon.
Manually assigning a messaging ticket
You can manually assign messaging tickets to yourself from the Notifications tab.
To get notifications about new tickets that have been created on your account, make sure that you enable notifications for All new tickets in the notification settings in the app (seeConfiguring notifications).
To manually assign a messaging ticket
- From the Notifications tab, tap on a ticket that is not yet assigned to you.
- On the Ticket's Conversation tab, tapTake it.

The ticket is now assigned to you and you can reply to the requester. SeeReplying to a requester.
Note:你也可以查看和编辑受让人正无穷ormation on a ticket'sDetails tab.
(遗留)和票一起工作
This section describes the legacy ticket view, which is available for iOS users and Android users who haven'tactivated the new agent experience.
Viewing tickets
You can open tickets to view and update them.
If rich text or markdown formatting is enabled for your account, that formatting (including inline images, and active phone numbers and links) is applied in the displayed ticket.
To view a ticket
- On the Tickets screen, tap the ticket you want to display. The ticket opens:
iOS Android 

- The ticket is separated into three different sections: The top section, the Conversation tab, and the Properties tab.
- Thetop sectionshows the requester information and the ticket subject.
- TheConversation tabshows the latest messages/emails/internal notes from the conversation in the ticket.
- TheProperties tabshows all of the ticket property information.
To return to the list of tickets in the view
- iOS users: Tap the Back icon in the upper-left of the screen (
 ).
). Android users: Tap the back arrow in the upper-left of the screen (
 ).Note:: The paper airplane in the upper-right of the screen indicates the number of changes you've made to the ticket. Make sure you tap it to submit the changes before leaving the ticket (
 ). This indicator persists across both tabs.
Viewing and updating ticket properties
| iOS | Android |
|---|---|
 |
 |
Due to space constraints, only the most frequently used ticket properties are shown. However, you can open the full list of ticket properties if needed.
To update ticket properties
- Open the ticket and tap theDetailstab.
iOS Android 

- Tap the property you want to update.
- Tap the new value for the property. The property is updated, and you're returned to the previous screen.
- When you're done making your updates, tap theSubmit changesicon in the bottom-right of the screen.
The submit changes icon is persisted across both the Conversations tab and the Details tab. Tapping on this icon from either tab will submit all changes made inside the ticket from both the Conversations tab and the Details tab.
Applying macros
You can apply any of your macros to tickets on the mobile app.
To apply a macro to a ticket
- Open the ticket and make any changes needed.
- Tap the Macro button beside the composer.
The Macros screen opens:
iOS Android 

- Select the macro you want to apply to the ticket, using one of the following methods:
- Tap the macro in the displayed list.
- Scroll through the list to locate the macro, then tap to select it.
- Tap the Search box, or Search icon, and enter keywords to locate the macro.
- Tap the macro you wish to apply. These changes will be reflected in the ticket once you return.
- Make any other changes necessary, then tap theSubmit changesicon again to post the updates.
Creating tickets
If you have permission to create tickets, you'll see the Create ticket icon on your screen.
iOS users:![]() .
.
Android users: .
.
To create a ticket
- Tap theCreate ticket iconto open the New ticket screen.
- If you have multiple brands, the multi-brand selector is displayed. Select a brand then tap thecheck mark(iOS), orOK(Android).
iOS Android 

- TapSubjectand enter a title for the ticket, then tapDone.
- TapEnter a descriptionand add a short explanation of the problem.
- TapDone.Note:You cannot submit the ticket unless theSubjectandDescriptionfields are filled out.
- TapNo requesterand select a user from the list to designate as the ticket requester. If you don't choose another user, you will be set as the requester. You can add a new user by entering an email address and tappingEnter.
- Tap the remaining property fields to enter information as needed. Add an附件if necessary.
- Tap theSubmit ticket iconto save and submit the ticket.
iOS Android 

Using attachments in tickets
You can view and download attachments, or add attachments to new tickets and comments.
If a ticket has one or more attachments in it, they're displayed below the comment. i
You can open an attachment by tapping it.
iOS users: The attachment opens in a new window.
Android users: If you do not have a default viewer set, you'll be asked to choose a method to open it.
Both Android and iOS allow you to attach images from the camera and gallery to a ticket. Additionally, Android users can attach other file types.
To add an attachment to a new ticket or comment
- Tap in the reply box to display the attachment options.
iOS Android 

- Tap the type of attachment you want to include.
Tap thecamera iconto take a photo.
Tap theimage iconto open the device's image gallery.
(Android only) Tap thefile iconto browse to a file.
- Finish adding your information and submit the ticket.
Playing attached calls and voicemails
Voicemails and recordings of voice calls can be played back in the app. Secure recordings are supported.
If a transcript is available, it is displayed along with the call metadata.
To play the recording or voice mail, tap thePlay buttonon the audio stream.
| iOS | Android |
|---|---|
 |
 |
Viewing service level agreements
If you are on Support Professional or Enterprise, and you use the service level agreements (SLAs) feature, you'll see the current SLA in your ticket details tab.
| iOS | Android |
|---|---|
 |
 |
Android users will also see the current SLAs applied to tickets in a view:

Tap the SLA property to view the list of current and upcoming SLA deadlines:
| iOS | Android |
|---|---|
 |
 |
For general information on service level agreements, seeViewing and understanding SLA targets.
Sharing tickets
If available, you can use your device’s sharing functionality to share a ticket link with another device. The specifics for sharing a ticket depend on a number of factors, including your operating system, and the target destination for the ticket. The procedure below shares general instructions for ticket sharing -- some steps may be different, based on these factors.
To share a ticket
- Open a ticket, as described inViewing tickets, above.
- Tap theticket options icon(
 ) at the top of the screen. The ticket options menu opens at the bottom of the screen.
 - TapShare. This opens the sharing options menu provided by your OS.
- Select the destination for the ticket. The sharing behavior varies depending on your selection:
- Another device(such as sharing via AirDrop): The ticket opens in Zendesk Support on the destination device, if the recipient has permission to view it.
- Message,Reminders,Notes,Mail, and the like: The app opens, and a link to the ticket in Zendesk Support is pasted into it.
- Social media(Facebook, Twitter, etc.): The app opens to a post composer, which already includes the link as an attachment.
- Complete the share as needed.
Deleting tickets
In the mobile app, you can delete individual tickets, or delete multiple tickets in a view at once (bulk delete).
To delete a single ticket
- Open a ticket, as described inViewing tickets, above.
- Tap theticket options icon() at the top of the screen. The ticket options menu opens at the bottom of the screen.
- Tap删除, then tapOKto confirm orCancelto keep the ticket.
For information on deleting multiple tickets in a view, seeDeleting tickets in bulk.
Marking tickets as spam
If a ticket is determined to be spam, you can mark it as such to move it into the Suspended Tickets view. SeeUnderstanding and managing suspended tickets and spamfor more information.
To mark a ticket as spam
- Open a ticket, as described inViewing tickets, above.
- Tap theticket options icon() at the top of the screen. The ticket options menu opens at the bottom of the screen.
- TapMark as spam, then tapOKto confirm. The ticket is moved to the Suspended Tickets view.
7 Comments
我们如何轻松获得知识edge base while working in this mobile app?
How can I copy/paste customer's information *to search in another program?
Many names, streets, email addresses are spelled very complex and a copy/paste function would be mandatory I would think?? Yet I can NOT even SEE the customer's email address, let alone copy it to paste into our Shipstation program for example to track a package. There must be a fix for this by now?
嗨,珍妮花,
To access your knowledge base, we'd recommend using your mobile browser, as the Support mobile app is designed around working with tickets.
You should be able to access your customer's email address and other data, however, if it's available: when you're in a ticket, if you tap directly on their name, it should pop up an information card, and if they have an email address associated with them, that should appear underneath their name. You can't copy it from there, but if you tap the "edit" link in the top right of the card and scroll down to the bottom, you should see any email addresses associated with their user record. Tap the ">" to the right of the email address, and that should allow you to copy (or edit) the email address. Other user fields should also be similarly available this way.
Hope that helps!
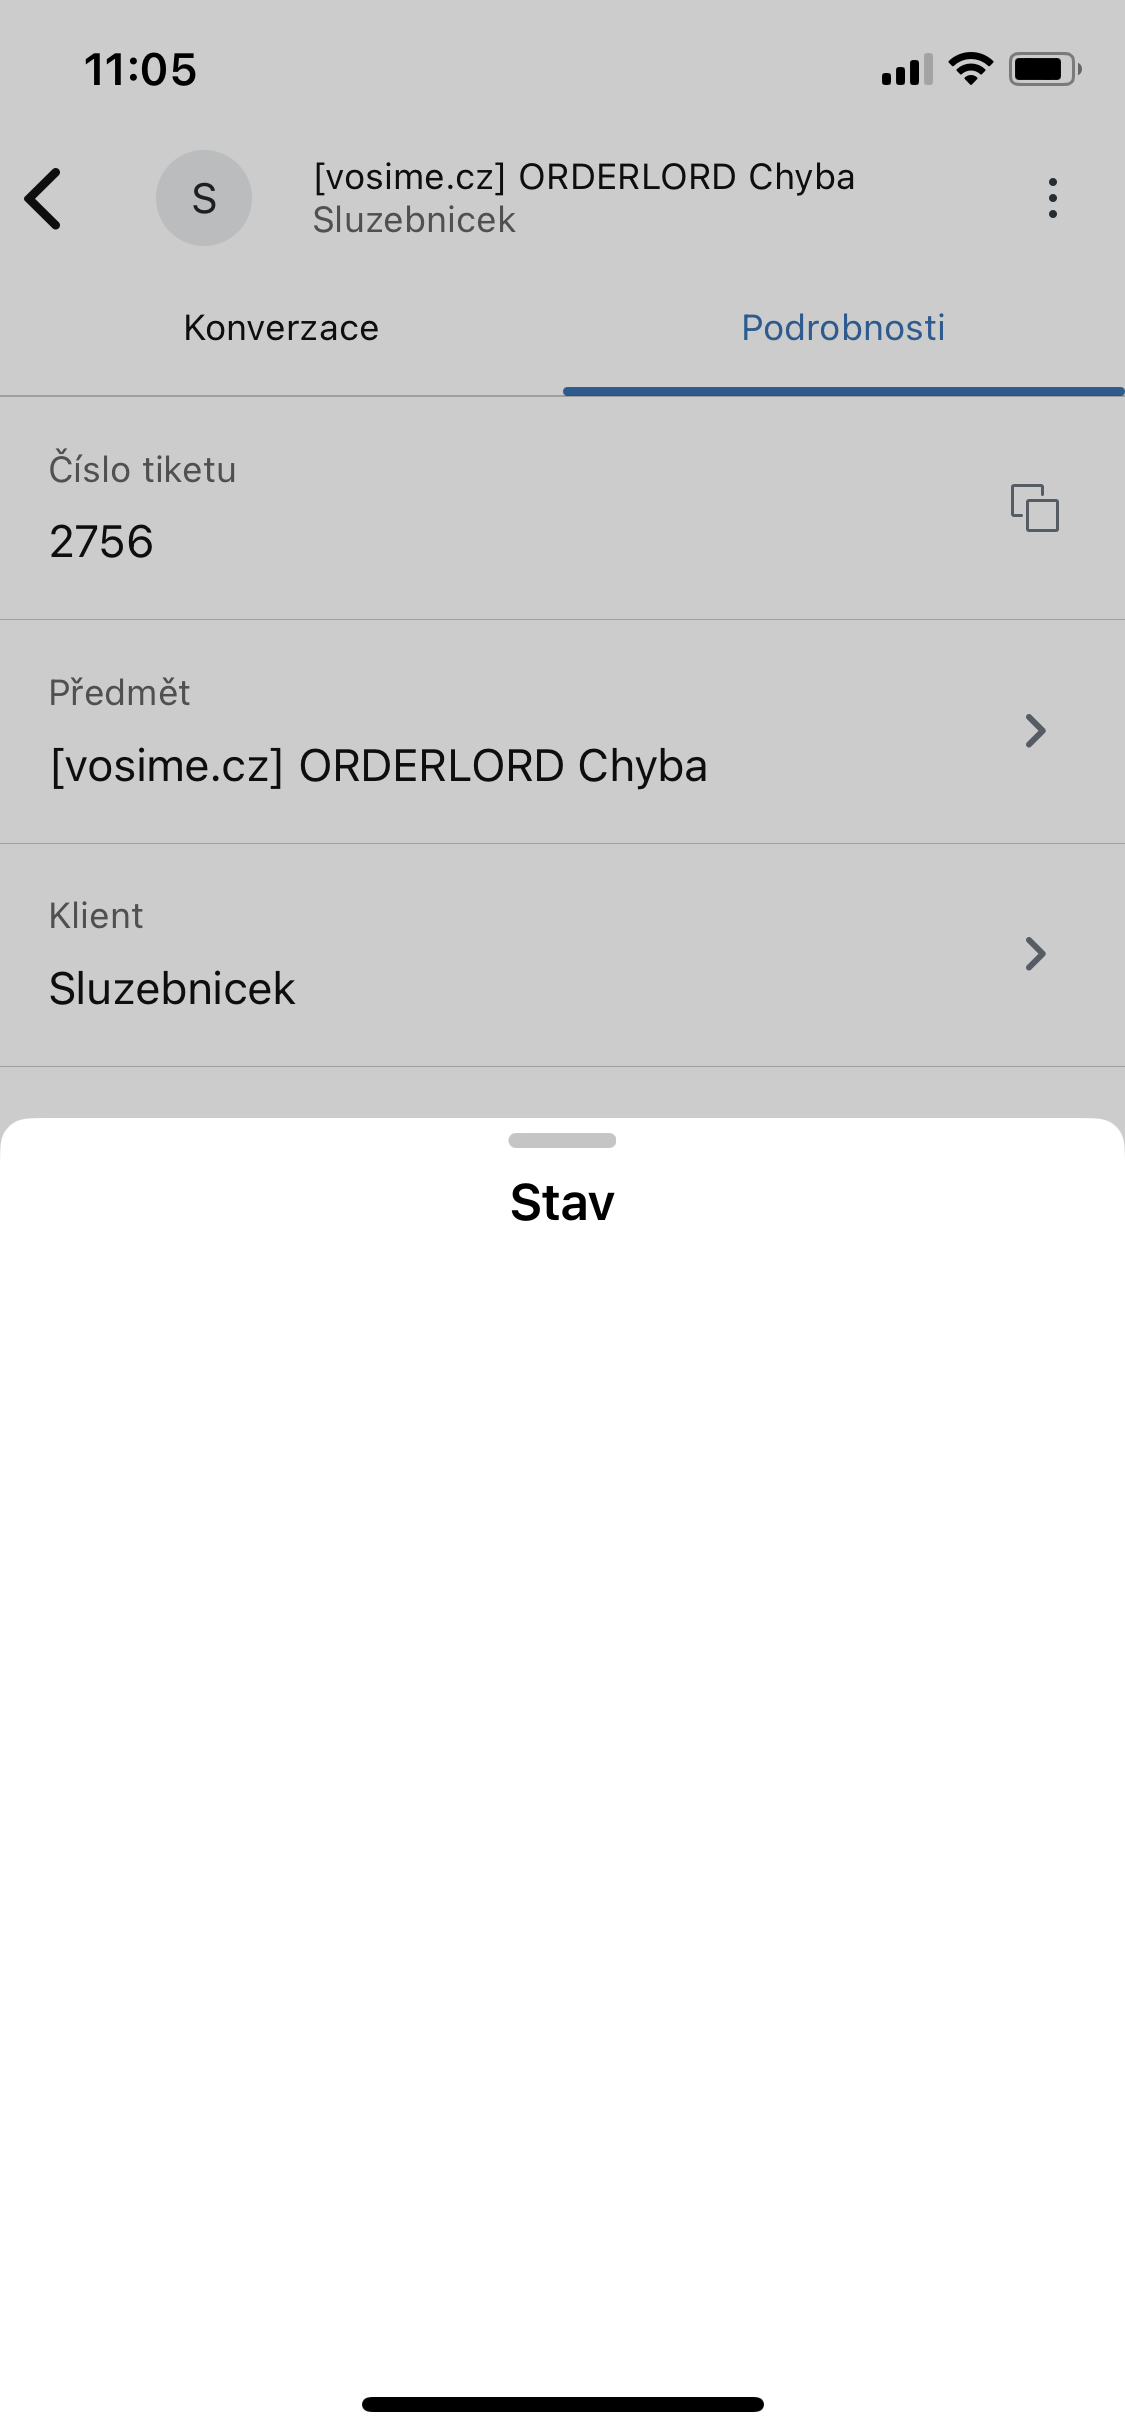
I can't change the status of a ticket in the iOS mobile app. I tried updating the app to the latest version and the problem still persists. As soon as I click on the status icon ("stav" in my language) no menu appears. I am attaching the screen.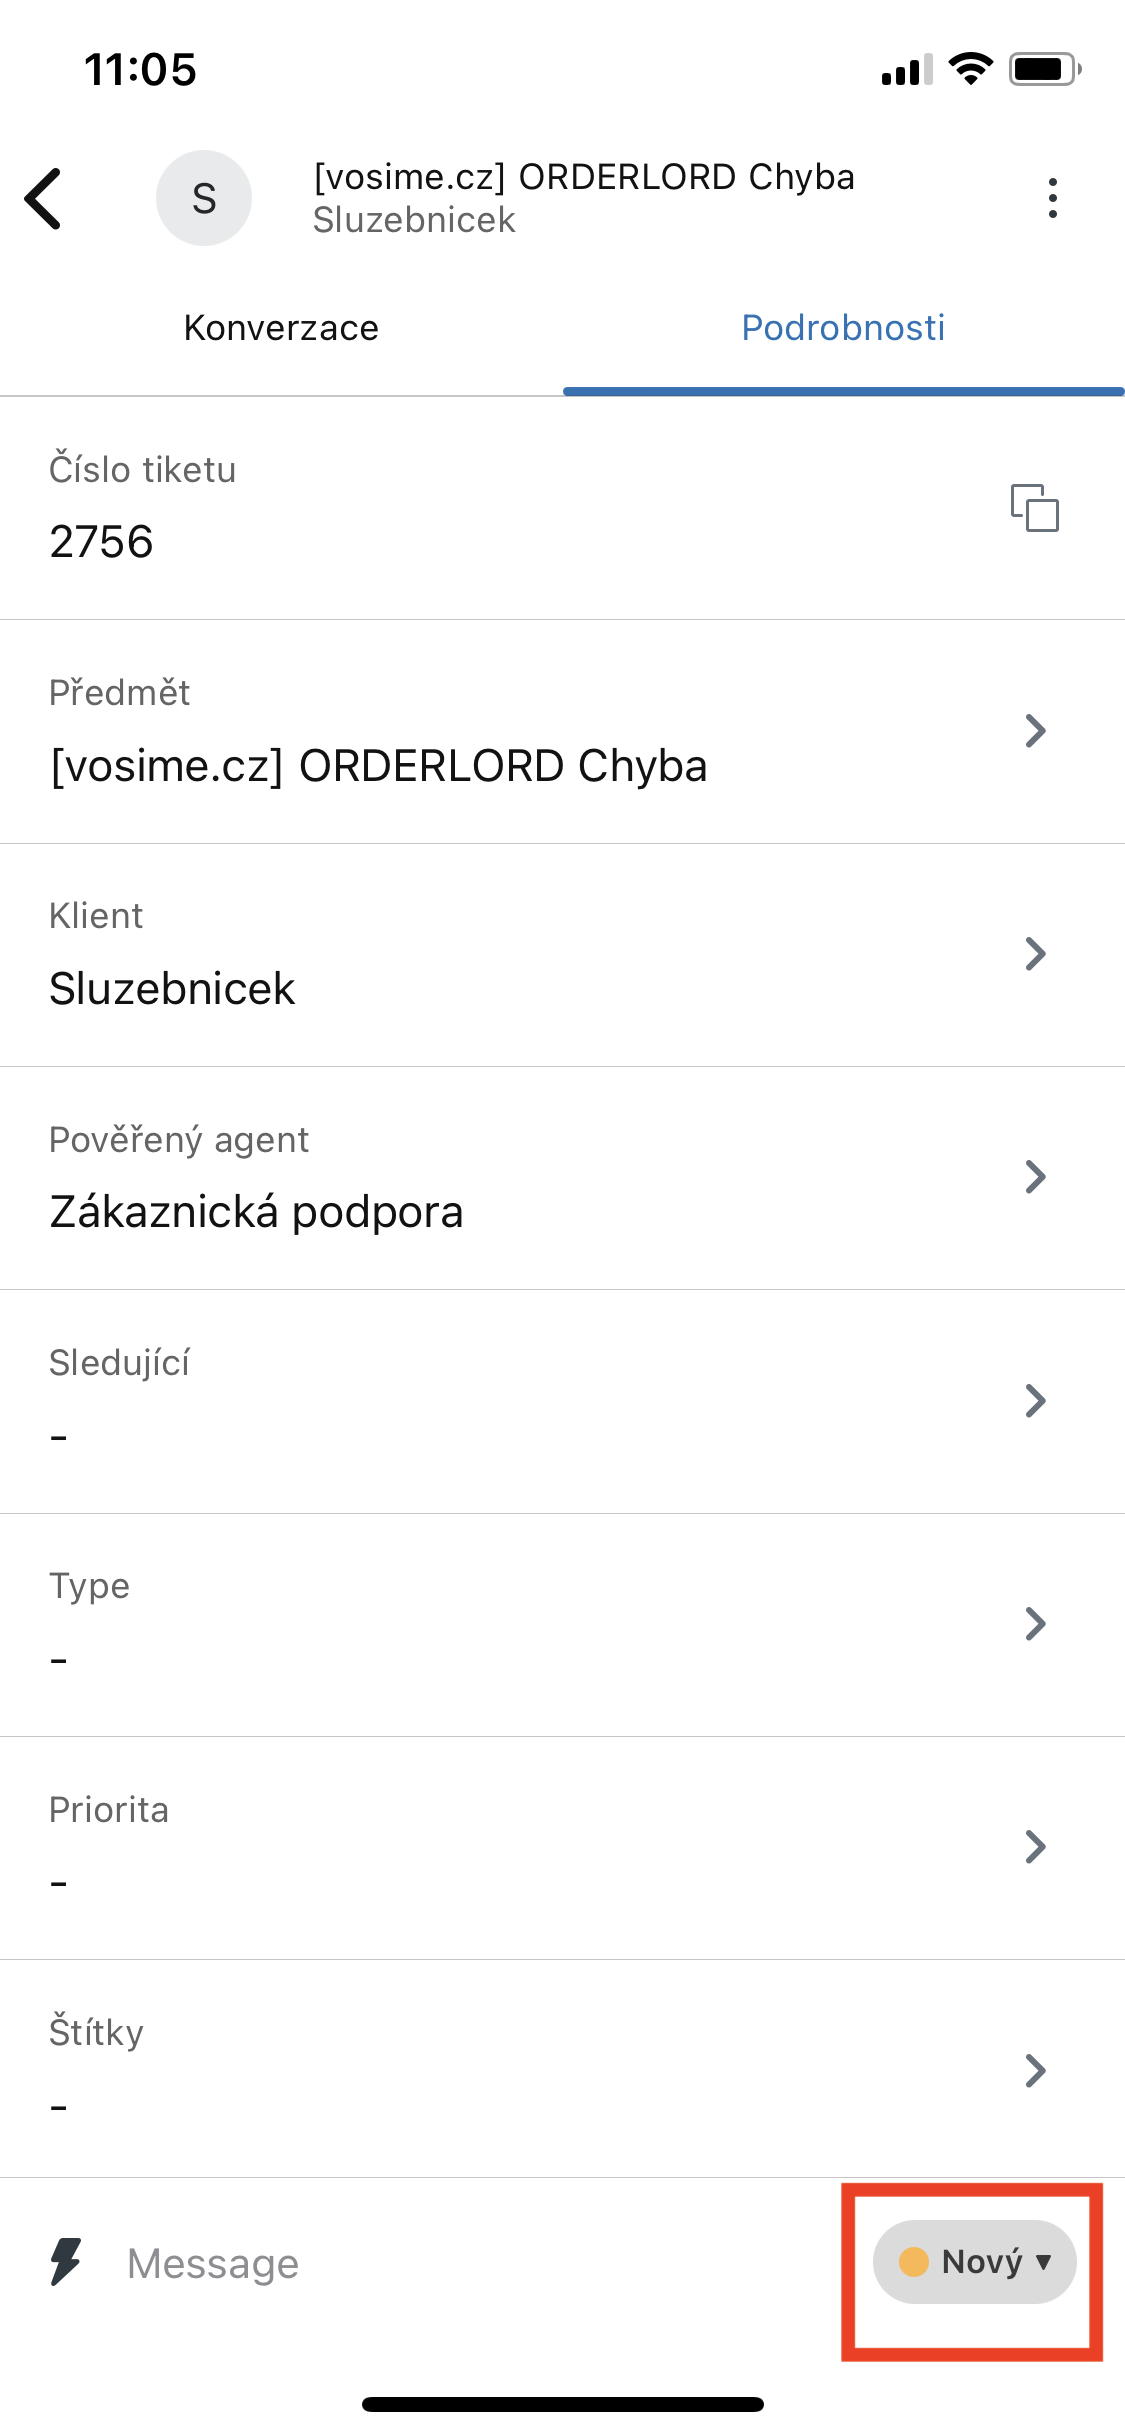
Upon checking, a support ticket has already been created for this concern. Please continue to work with the Advocate assigned to your ticket to efficiently resolve it.
How do users of the mobile app see tickets they are following? They cannot access the normal user profile page.
HiTim Barrett,
At the moment, the user profile page is still not available for the iOS Support mobile app. I would suggest sharing your use case with us in ourproduct feedback forumso they can consider adding this functionality in the future.
Pleasesign into leave a comment.