Getting started with custom objects
The Zendesk REST API provides many object types for storing and managing your customer data, from tickets, users, organizations, and more. However, it can't provide every possible object type that your organization might need. For example, you might want to associate each new ticket with a retail store to get a better picture of the customer and of the store.
Use the Custom Objects API to define a new object type in Zendesk, then create objects from the new object type. A custom object can be just about anything, including service contracts, products, households, or customer visits. The API lets you create, read, update, or delete the objects.
You can use your custom objects in your integrations or with the Zendesk Apps framework to extend existing Zendesk product functionality.
This guide shows you how to create and use custom objects with the Zendesk API. The example takes an IT team that maintains the computers of company employees. The IT team wants to include details about each computer in the support tickets that employees submit when they have trouble with one of them. You can define a new computer object type in Zendesk, then create an object for each computer to store details about each one. You can also associate computers with tickets to monitor their reliability.
Enabling custom objects
Custom objects are available on all Zendesk Suite plans. If you're interested in becoming a Zendesk developer partner, you can convert a trial account into a sponsored Zendesk Support account. SeeGetting a trial or sponsored account for development.
Custom objects must be enabled by an administrator in Zendesk Support. If you're not an admin, ask one to enable them for you.
To enable custom objects in your account
In Zendesk Support, click the Zendesk Products icon (
 ) in the top bar, then select Admin Center on the lower side of the pop-up box.
InAdmin Center, click theObjects and rulesicon (
 ) in the sidebar, then selectCustom Objects>Objects.
The Custom Objects and Relationships page opens:
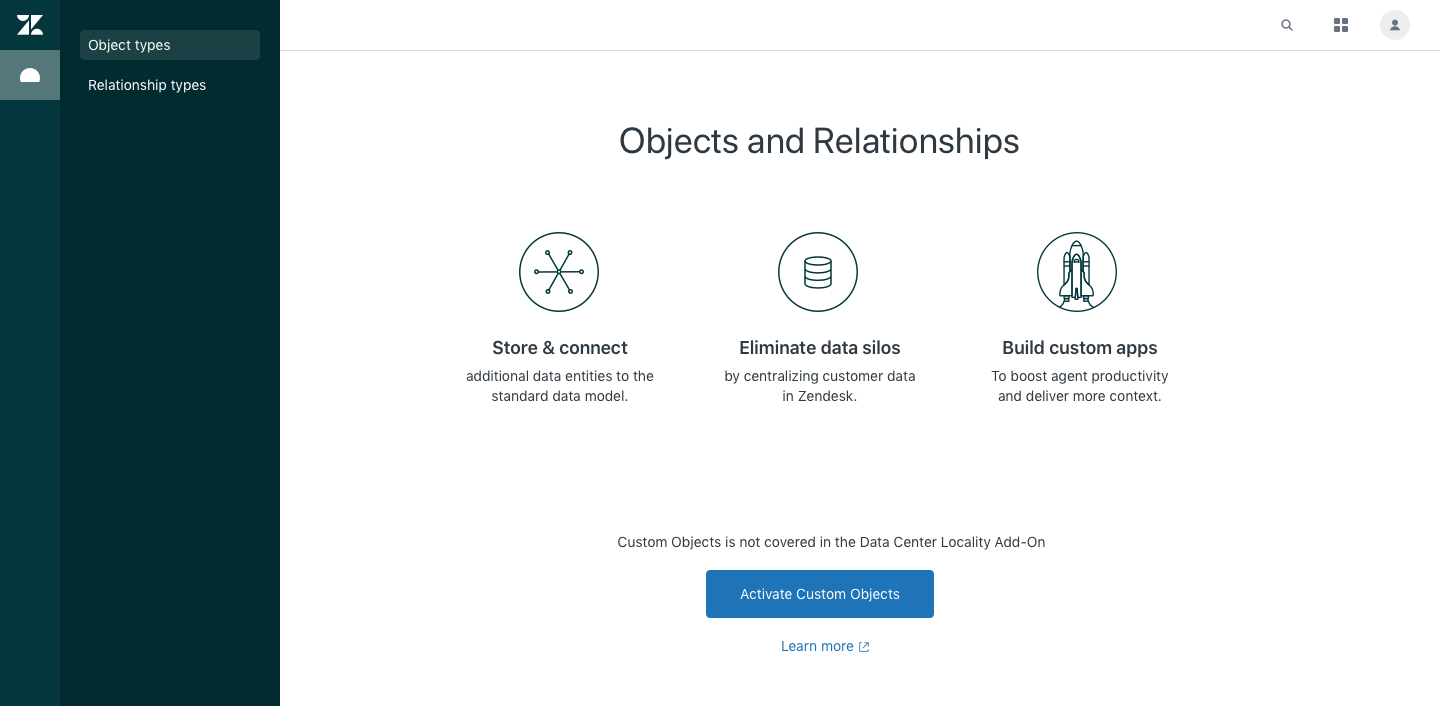
ClickActivate Custom Objects.
Defining a custom object type
At its most basic, an object type consists of akeyand aschemathat describes the data. The key is the name you want to use to identify the object type. Example: "computer".
After discussions with the IT team, you agree to define an object type for all the personal computers (PCs) in the company. Each PC should be represented as an object record with the following very basic properties:
| Name | Type | Mandatory | Comment |
|---|---|---|---|
| id | string | yes | Unique identifier assigned to the computer by IT |
| model | string | no | Make and model of the computer |
| is_laptop | boolean | no | Whether or not the computer is is_laptop |
These details make up your schema. Notice that the schema doesn't contain any PC information. It just describes that information. To learn more, seeCreating a schema for a custom object.
To create the "pc" object type, include the schema in a POST request to the following endpoint:
POST /api/sunshine/objects/types
Note: The Custom Objects API introduces a new Zendesk API design. For example, the paths don't have a version number and the resources don't have.jsonextensions. The existing v2 APIs are unaffected.
Try it yourself
Save the following JSON object in a file namedpc_object_type.json.
{"data":{"key":"pc","schema":{"properties":{"id":{"type":"string","description":"Unique identifier assigned to the computer by IT"},"model":{"type":"string","description":"Make and model of the computer"},"is_laptop":{"type":"boolean","description":"Whether or not the computer is a laptop"}},"required":["id","model"]}}}The
dataobject consists of akeyand aschema. You'll use thekeyto identify the object type in other endpoints. For example, when you create a pc object record later in this tutorial, you'll set thetypeto "pc" as follows:{"data":{"type":"pc","attributes":{"id":"ASSET-2018pc32","model":"Apple MacBook Pro","is_laptop":true}}}Your key must meet the following requirements:
- 是独一无二的
- Only contain alphanumeric characters (a-z, 0-9), underscores (_) and dashes (-)
- Have a minimum of 2 characters and maximum of 32 characters
The system changes all uppercase characters in the key to lowercase.
In your command-line interface, navigate to the folder containingpc_object_type.json.
Paste the following curl command into your command-line interface and press Enter.
curl https://{subdomain}.亚博.com/api/sunshine/对象/types \-d @pc_object_type.json \-H"Content-Type: application/json"\-v-u{email_address}:{password}-XPOSTMake sure to replace the placeholder values with your own.
Windows users: Replace the line-continuation backslashes (\) in this and the other examples with caret () characters.
Example response:
{"data":{"key":"pc","schema":{"properties":{"id":{"type":"string","description":"Unique name assigned to the computer by IT"},"model":{"type":"string","description":"Make and model of the computer"},"is_laptop":{"type":"boolean","description":"Whether or not the computer is a laptop"}},"required":["id","model"]},"created_at":"2018-10-28T18:13:26.003Z","updated_at":"2018-10-28T18:13:26.003Z"}}
To learn more, seeCreate Object Typein the API docs.
Adding object records
Once the pc object type is created in your Zendesk Support instance, you can use the Zendesk API to create, read, update, and delete individual pc object records. Object records are nothing more than data objects with defined properties.
The first task is to create an object record for each PC. You can use theCreate Object Recordendpoint:
POST /api/sunshine/objects/records
The data you include in the request is defined by the object type you defined, which for the pc type consists of attributes named "id", "model", and "is_laptop". Example:
{"data":{"type":"pc","attributes":{"id":"ASSET-2018pc32","model":"Apple MacBook Pro","is_laptop":true}}}
The objects are stored in the Zendesk infrastructure. You can use the Zendesk API to access them.
- If you want to use the data, you can use several different GET endpoints to retrieve your objects. See theObject RecordsAPI docs.
- If your IT team makes a change to the PC, you can use theUpdate Object Recordendpoint to update the object for that PC in Zendesk.
- If IT gets rid of the PC, you can use theDelete Object Recordendpoint.
- If IT adds another PC, you can use theCreate Object Recordendpoint.
Try it yourself
Save the following JSON object in a file namedobj_pc.json:
{"data":{"type":"pc","attributes":{"id":"ASSET-2018pc32","model":"Apple MacBook Pro","is_laptop":true}}}You must specify "pc" as the object type.
In your command-line interface, navigate to the folder containingobj_pc.jsonand run the following curl command:
curl https://{subdomain}.亚博.com/api/sunshine/对象/records \-d @obj_pc.json \-H"Content-Type: application/json"\-v-u{email_address}:{password}-XPOSTReplace the placeholder values with your own.
The response will include an id for the object record:
{"data":{"type":"pc","id":"5d0daa84-aec0-11e7-9a70-416881d66b6d",...}}Don't confuse the object record id (
"id":"5d0daa84...") with theidattribute in your custom object ("id":"ASSET-2018pc32").
You can use the object record id to make a GET request for the object, as follows:
curl https://{subdomain}.亚博.com/api/sunshine/对象/records/5d0daa84-aec0-11e7-9a70-416881d66b6d \-v-u{email_address}:{password}
To learn more, seeCreate Object RecordandShow Object Recordin the API docs.
Modeling your data
After adding pc objects to your Zendesk Support instance, you can establish relationships with other objects in Zendesk to use the data in more meaningful ways. For example, information about a particular PC is not very useful to an IT manager unless it's associated with tickets that employees submitted about the PC.
Custom objects support several relationship types:
One-to-one- Both object types can have only one object on either side of the relationship. For example, a ticket would only be associated with a unique PC, and a PC would only be associated with a unique ticket. This isn't a viable option in the IT department example. The number of pc objects would have to equal the number of ticket objects.
One-to-many- Each object of the first object type relates to none, one, or many objects of the second object type. For example, a PC can be associated with none, one, or many tickets.
Many-to-many- Each object of the first object type relates to none, one, or many objects of the second object type, and each object of the second object type relates to none, one, or many objects of the first object type. You define a many-to-many relationship type with two one-to-many relationship types.
A relationship type can be between:
- 两个自定义对象类型(“个人电脑”和“office_之间location" object types, for example)
- one custom object type and any of the following Zendesk object types: tickets, users, articles, organizations, groups, or chats
- two Zendesk object types
To define a relationship type, you make a POST request to theCreate Relationship Typeendpoint:
POST /api/sunshine/relationships/types
Defining a relationship type doesn't create an association between two specific objects. It just describes the relationship record. To associate two objects, you must create arelationship recordbetween the two objects. That's covered later inAssociating related objects.
Try it yourself
For the IT department, you decide to define a one-to-many relationship type between PCs and tickets. Each ticket can be associated with only one PC, but each PC can be associated with many tickets.
Save the following JSON object in a file namedrelationship_type.json.
{"data":{"key":"pc_has_many_tickets","source":"pc","target":["zen:ticket"]}}Choose a unique
keyvalue (here, "pc_has_many_tickets") for each relationship type you define.The square brackets around the target
["zen:ticket"]sets the "many" side of the one-to-many relationship type. Omit the brackets to define a one-to-one relationship type.The definition reads as follows: A PC can be associated with many tickets, but a ticket can be associated with only one PC.
Use the 'zen:' prefix to specify one of the Zendesk object types. Examples:
- "zen:ticket"
- "zen:user"
- "zen:article"
- "zen:organization"
- "zen:group"
- "zen:chat"
- "zen:lead"
- "zen:contact"
- "zen:deal"
Note: You can't modify the relationship type once it's created. You'll need to delete it and create another one. SeeRelationship Typesin the API docs.
In your command-line interface, navigate to the folder containingrelationship_type.jsonand run the following curl command:
curl https://{subdomain}.亚博.com/api/sunshine/relationships/types \-d @relationship_type.json \-H"Content-Type: application/json"\-v-u{email_address}:{password}-XPOSTReplace the placeholder values with your own.
To learn more, seeCreate Relationship Typein the API docs.
Once you've defined a relationship type, you can start associating related objects.
Associating related objects
You associate an object of one object type to an object of another object type by creating arelationship record(not to be confused with a relationship type). For your IT department, you can create a relationship record between a particular ticket and a particular PC.
A relationship record consists of the ids of the two related objects and their relationship type. The record doesn't contain any actual object data. Instead, you use the ids in the relationship record to retrieve the related data (covered inRetrieving related objectslater).
A relationship record is governed by a relationship type you created. So far you created a one-to-many type named "pc_has_many_tickets" where each ticket can be associated with only one PC, but each PC can be associated with many tickets.
To create a relationship record, make a POST request to theCreate Relationship Recordendpoint:
POST /api/sunshine/relationships/records
The JSON object you include in the request must specify the relationship type, as well as the ids of thesourceandtarget对象. Example:
{"data":{"relationship_type":"pc_has_many_tickets","source":"1c771ee0-2c3f-11e7-bf60-e5c3f630b5aa","target":"zen:ticket:35437746"}}
For"relationship_type", you must specify the key you chose when creating the relationship type -- in this case "pc_has_many_tickets".
Note: Once created, you can't modify the relationship record because of the underlying relationship type. You must delete the relationship record and create another one.
Try it yourself
找到或创建一个测试票Zendesk中亚博rt instance. Example:
{"ticket":{"id":35437746,"subject":"My computer is on fire!",...}}Get the id of the related pc object in your Zendesk Support instance. Example:
{"data":{"type":"pc","id":"5d0daa84-aec0-11e7-9a70-416881d66b6d","attributes":{"id":"ASSET-2018pc32","model":"Apple MacBook Pro","is_laptop":true},...}}SeeObject Recordsin the API docs for the various GET requests you can make.
Save the following JSON in a file namedrelationship_record.json, replacing the ids with your own:
{"data":{"relationship_type":"pc_has_many_tickets","source":"5d0daa84-aec0-11e7-9a70-416881d66b6d","target":"zen:ticket:35437746"}}The example creates a relationship record between a particular PC and a particular ticket. The source and target ids should correspond to the source and target object types in the relationship record type -- in this case, pc id and ticket id.
In your command-line interface, navigate to the folder containingrelationship_record.jsonand run the following command:
curl https://{subdomain}.亚博.com/api/sunshine/relationships/records \-d @relationship_record.json \-H"Content-Type: application/json"\-v-u{email_address}:{password}-XPOSTExample response:
{"data":{"id":"5d3484b5-aec6-11e7-9a70-a12d6a7d800c","relationship_record_type":"pc_has_many_tickets","source":"5d0daa84-aec0-11e7-9a70-416881d66b6d","target":"zen:ticket:35437746","created_at":"2018-09-28T21:52:22.709Z"}}
Retrieving related objects
Use theList Relationship Records by Object Recordendpoint to retrieve the relationship records:
GET /api/sunshine/objects/records/{resource_id}/relationships/{relationship_type_key}
For example, to get all the related tickets for the PC with the id of "5d0daa84-aec0-11e7-9a70-416881d66b6d", you'd make the following GET request:
curl https://{subdomain}.亚博.com/api/sunshine/对象/records/5d0daa84-aec0-11e7-9a70-416881d66b6d/relationships/pc_has_many_tickets \-v-u{email_address}:{password}
Example response:
{"data":[{"id":"c5477230-2e98-11e7-acd9-9dbd5d6450d8","target":"zen:ticket:35438118","ref":"/api/v2/tickets/35438118"},{"id":"5d3484b5-aec6-11e7-9a70-a12d6a7d800c","target":"zen:ticket:35437746","ref":"/api/v2/tickets/35437746"}],"links":{"previous":null,"next":null}}
Putting it all together
You can use your custom objects and relationship records to solve real-world problems, to improve existing processes, or simply to get a better picture of your customers. For example, you could use the pc objects to build a Zendesk app that shows details about a computer to the agent working on a ticket.
One approach to building this app would be toadd a dropdown listto the ticket form in Help Center that lets users select a PC when they submit a ticket. When designing the ticket field, you'd use the object ids of the pcs as the option values (or "tags", in Zendesk terms). For example, "5d0daa84-aec0-11e7-9a70-416881d66b6d". You could thenbuild a sidebar appin the agent interface to display the computer details. The app would take the option value from the ticket tomake an API requestto get the computer details.
The app could also make an API request tocreate a relationship recordbetween the PC and the ticket when the agent changes the ticket status from New to Open. You could then use the Zendesk API in your system to generate reliability reports that list all the tickets for each PC.
Join the discussionabout this article in the community.